

DIY "retro" Dr Pepper Cooler
- sunnyslopefillingstation

- May 9
- 1 min read
Updated: May 13
How to take a plain retro look cooler and turn it into a vintage inspired Dr. Pepper cooler.

Step 1:
Purchase a retro look cooler on Amazon.
Here's a link to the one I used: https://amzn.to/4d1TZP6
(As an Amazon Associate, I earn from qualifying purchases.)
I searched high and low for a vintage Dr Pepper green colored one, but it couldn't be found. I have to give credit where credit is due on this project, my brother-in-law did this YEARS ago and he did find that perfect Dr Pepper green, so I'm a bit jealous! But I'll save you the time and let you know I didn't find anything of the sorts on Amazon, at least at this time!
Step 2:
Remove badge
I used a blow dryer to heat up the badge and then it removed easily.
Step 3:
Remove goo from badge
Then I used a cotton ball dipped in rubbing alcohol to remove the sticky goo the badge left behind, cleaned up real nice!

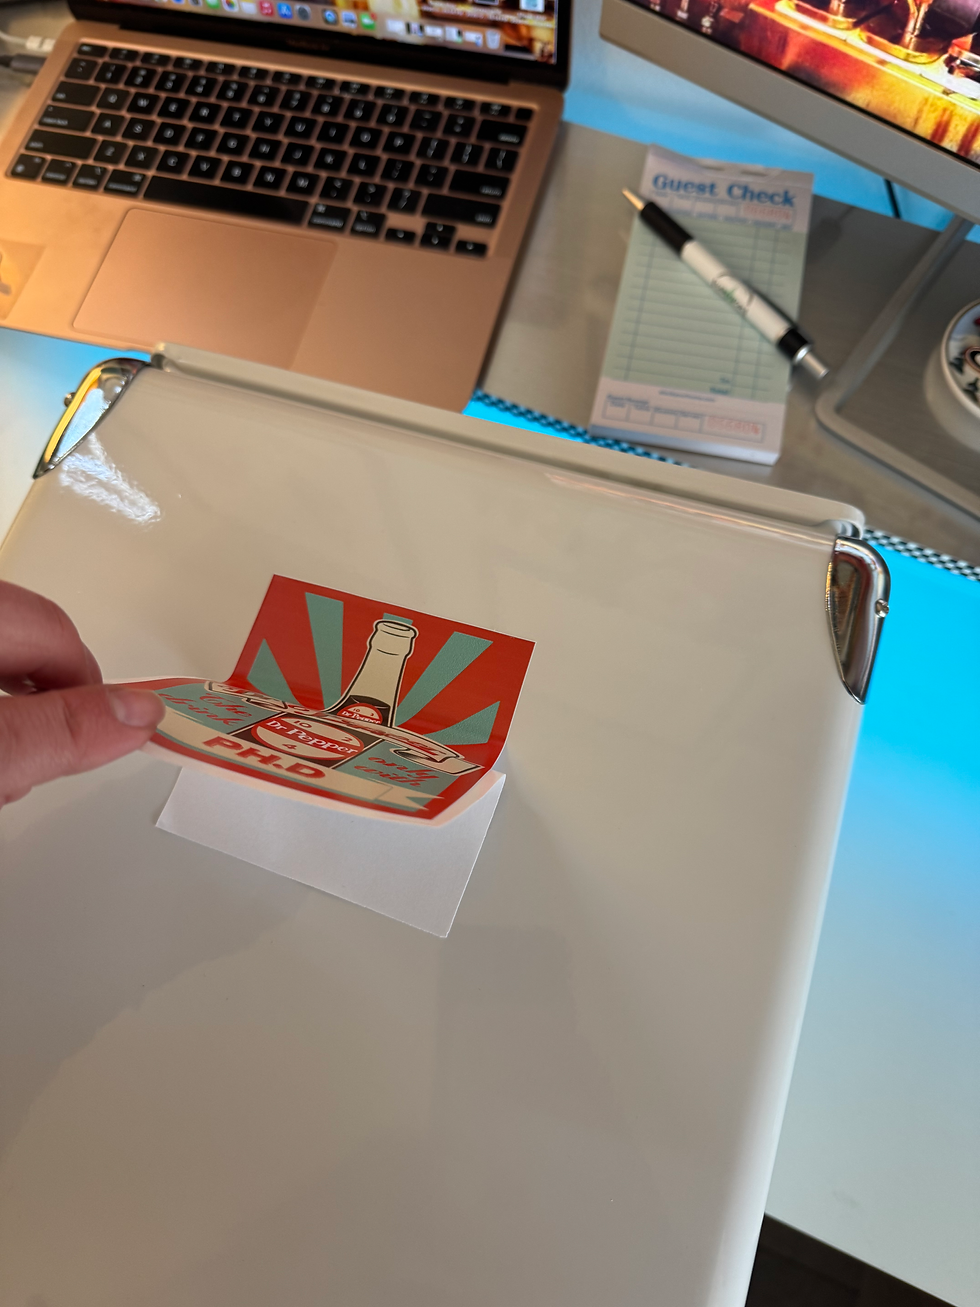
Step 4:
Apply stickers
You could use whatever style of stickers, for this project I wanted a Dr Pepper inspired cooler, so that's what I went with. So I used the cotton ball with rubbing alcohol already on it and cleaned the area I was going to apply the sticker to ensure it was clean. Then I carefully placed the sticker ensuring there were no air bubbles.

Step 5:
That's all! Enjoy your vintage inspired cooler!


Comments